I got lots of pattern requests, so here it is!
If you run into any problems, please don't hesitate to leave a comment and ask questions!
This pattern is licensed under Creative Commons. This means that you are allowed to use the pattern for whatever you like, as long as you give me credit. For example, if you like the pattern and want to post it on your website, feel free to do so as long as you include my name and a link to http://www.saltwaterpurls.blogspot.com , and notify me via e-mail (link on my "Profile" page).
You may also print out and make copies to give to friends, use in a class, or swap/trade.
Items you make using this pattern are YOUR property, meaning you can do whatever you like with them, even sell them if you want (which is not the case with most knitting patterns).
For more information, click the button below:
This work is licensed under a
Creative Commons Attribution 3.0 United States License.
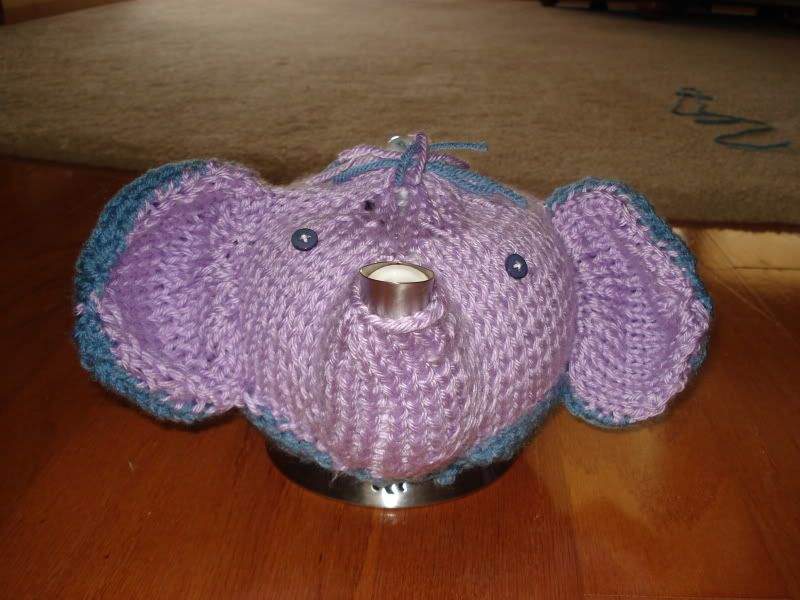
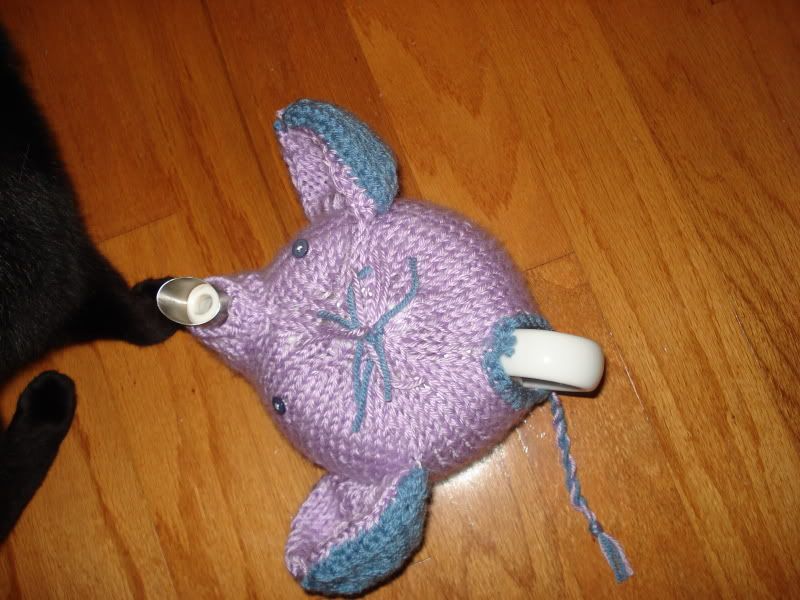
Elephant Tea Cozy Pattern
by Jill Mongato, 2007
Licensed under Creative Commons
This pattern fits a teapot with a 19” circumference at the widest point. If your teapot is larger or smaller, adjust your gauge or change the number of stitches/rows. It might take a little bit of adjustment to get it right.
Yarn
MC: Caron’s Simply Soft in #9717 Orchid. You’ll use less than half a skein.
CC: Red Heart Super Saver #0382 Country Blue. You only need a few yards for trim.
Needles
Sz. 8 DPNs (4)
Misc. Supplies
Size 8/H crochet hook
Yarn needle
Stitch holder/spare needle
Spare circular needle (any size)
2 small buttons
Sewing needle and thread
Gauge
15 stitches/20 rows = 4” in Stockinette stitch (CC gauge will be slightly larger.)
Pattern Notes
READ BEFORE STARTING!
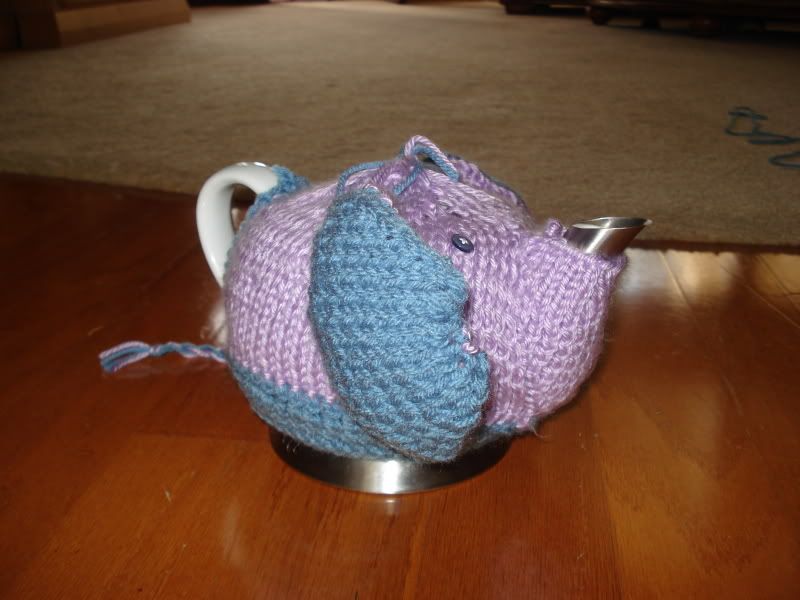
The finished cozy has a slit in the back for the handle to fit through. The pattern starts in the round. After a few rows, you’ll split for the opening by turning your work and purling the next row. Continue in Stockinette until the slit is the length of the handle, then re-join and finish the cozy in the round. The pattern will refer to “Rounds” or “Rows” when appropriate.
Body
CO 56 stitches, using long-tail cast on, or substitute any cast-on that is easy to pick up and crochet into.
Divide stitches onto DPNs, being careful not to twist, and join.
Round 1: K all sts
Round 2: K to last stitch. K into front and back of st.
Round 3: K into front and back of st, K around (58 sts)
Round 4: K1, K f+b, K 27, turn work to divide for handle (You will now be working flat. See Pattern Notes).
Row 5: Purl 31, P front and back, P 27, turn work (60 sts)
Row 6: K 32, K f+b, K 27, turn
Row 7: P 33, P f+b, P 27, turn (62 sts)
Row 8: K 20, K f+b, K 20, K f+b, K 20, turn
Row 9: P 20, P f+b, P 22, P f+b, P 20, turn (66 sts)
- Note: This pattern was corrected for errors on 18 March 2008. If you downloaded or printed the pattern before this date, please check Rows 8 and 9 and make corrections.
Row 10: K 14, K f+b, K 22, K f+b, K 13, K f+b, K 8, K f+b, turn
Row 11: P 39, P f+b, P 29, turn (70 sts)
Row 12: K 20, K f+b, K 19, K f+b, K 8, K f+b, turn
Row 13-15 (or number of rows required to reach correct handle slit length):
Work in Stockinette across
Row 16: K to end of row, re-join across slit
Round 17: Knit around
Round 18: K 10, K 2 together, K4, K 2 tog, K 4, K 2 tog, K5
Divide for Spout: Slip the 14 spout stitches onto a spare needle or stitch holder to pick up and knit later.
Continue knitting next stitch after spout sts:
K 5, K 2 tog, K 4, K 2 tog, K 4, K 2 tog, K 10
Rounds 19 and up:
*K 2, K 2 tog* across each round until 10 stitches remain.
Break yarn. Draw yarn through remaining stitches, pull tight and secure.
FOR THE NEXT PART OF THE PATTERN, YOU WILL BE WORKING WITH THE COZY WHILE IT IS ON THE TEAPOT.
Transfer the spout stitches from the stitch holder onto a circular needle, so they can wrap around the spout.
Fit the cozy over the teapot.
Note adjustments you need to make and correct them before proceeding!
Work bottom of teapot
You will probably have a gap between the bottom of the cozy and the bottom of the teapot. You will now crochet a band to cover this gap.
Using crochet hook, Single crochet into each cast-on stitch.
Continue in SC until you reach the bottom of the teapot, decreasing as necessary to follow the shape of the pot.
Work Spout
Measure the length of the spout that is sticking out of the cozy. You’ll want to leave a little space (about ½ to ¾ inch) uncovered; subtract this from the measurement.
Multiply the length you need to knit by your number of rows per inch to determine the number of rounds you need to knit. Write this down!
NOW, TAKE THE COZY BACK OFF THE TEAPOT.
Transfer the stitches onto DPNs.
Pick up 6 sts from above the spout stitches (where you re-joined the body after transferring the spout sts to the holder).
Join and knit stitches in the round until you reach the correct number of rounds. Bind off loosely and break yarn.
Ears
Make 2 MC and 2 CC:
Cast on 10 sts
Row 1: P all sts
Row 2: K f+b into all sts (20 sts)
Row 3-7: Work in Stockinette
Row 8 and up: Work in stockinette, decreasing 1 stitch at the beginning of each row until
12 stitches remain.
Next Row: *K 2 together* to end. (6 sts)
Break yarn and pull through remaining stitches; secure end.
Sew MC ears to CC ears right-side out.
Finishing
Handle: Crochet with CC around slit.
Tail: Sew or twist a few strands of yarn together. Thread through yarn needle and
secure to back of body below handle.
Ears: Sew flat sides of ears onto body using scraps and yarn needle.
Eyes: Using sewing needle and thread, sew buttons to face.
Hair: Make a pompom from yarn scraps and sew to top of head.
Weave in all ends and you’re done!
J Says:
This post is pretty old, so I may not check comments very often. If you have a comment or question, I'd still love to answer you! Send me an e-mail (address is in my profile) or a message on Ravelry (username: Jillie).